MODIFY SLIDER #4 TO TILT TO 0 ORDER
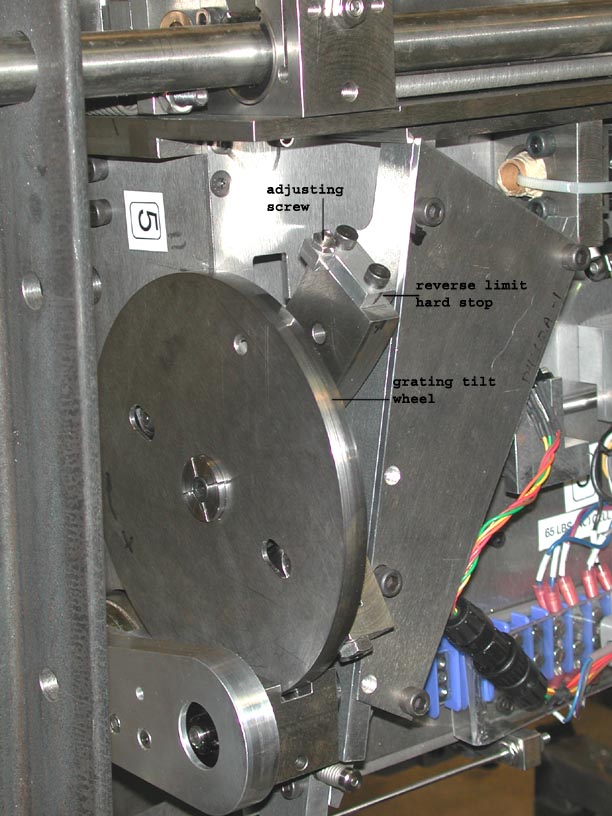
(Note: Some pictures are of slider #5, which is mirror imaged from slider #4)
1) Remove grating from slider #4.
2) Remove cladding panel D8810-1. (Note: may also need to remove panels D8810-2 & D8801-2
3) Remove panel D1346-1 from focal plane baffle assembly D1351-1. Note light seals near center of arc so they can be replaced when panel is reinstalled.
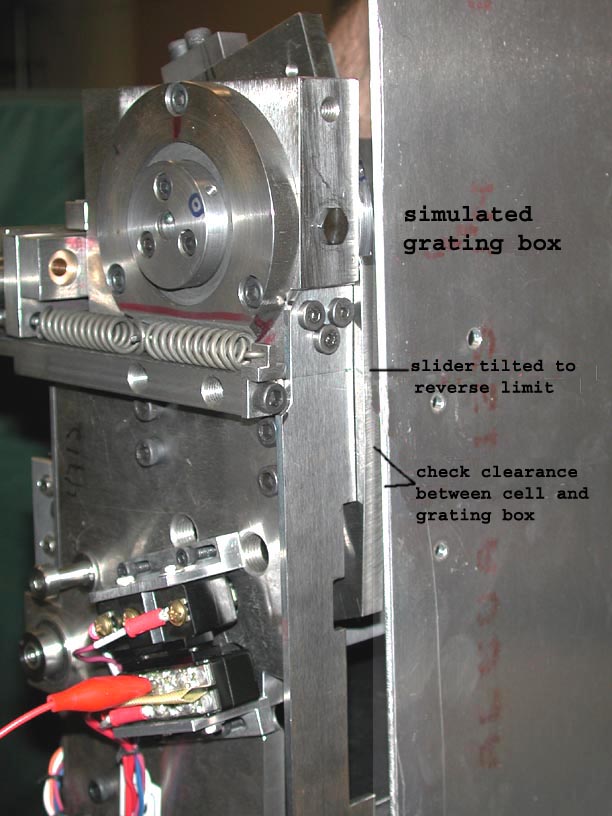
4) Position slider #4 in front of grating box, not clamped.
5) Tilt grating to reverse hard stop by hand by rotating grating tilt wheel (D4581-1).
6) Check clearance between slider and grating box with mirror and feeler gauge.
(Expect ~ 1/8 to ¼ in.)
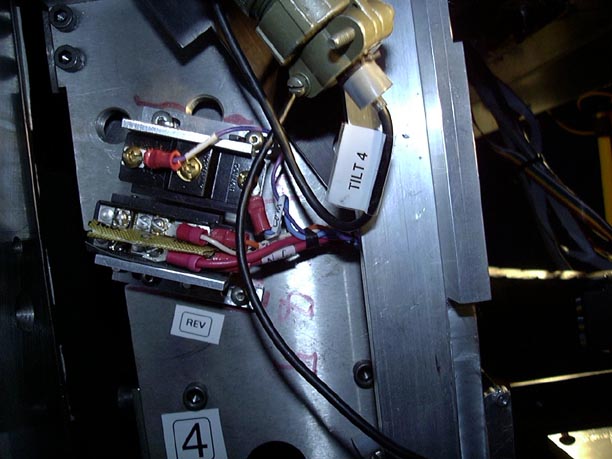
7) Replace limit switch brackets with new ones (D4597-1, D4597-2).
8) Remove tilt adjusting screw and tilt to stop (D4643-3).
9) Check grating tilt with GUI.
10) If tilt angle is -19.15 deg +- 0.05 deg OK, if greater replace with new one then adjust angle with adjusting screw.
A) if less replace adjusting screw and adjust
B) if greater replace with new one and adjust angle with adjusting screw. Check clearance of adjusting screw and brace D4370-1
11) Check clearance between slider and grating box with mirror and feeler gauge, if > 1/8 in OK, continue.
12) Adjust secondary limit to 18.90 deg +- 0.1 deg.
13) Adjust primary limit to 18.60+- 0.1 deg.
14) Replace focal plane baffle panel, be sure light leaks are plugged.
15) Replace cladding.